How to Install Pallet Rack: Teardrop Racking (Video)
Today we're continuing our how-to series by showing you how to properly install teardrop pallet rack. Check out the video and transcription below. If you need help installing your pallet racking, contact us as we're ready to help!
Installation Tools You'll Need
- Tape measure
- String line
- Sharpie
- 1/2 inch anchors
- J lock safety pins
- Shims for leveling uprights
- Hammer drill
- Level for squaring racking after we've assembled it
Prep Your Space
To get started, the first thing you want to do is look up to make sure that you're clear. When you stand up your uprights, you can hit lights, heaters, or other obstructions and that wouldn't be good. The next thing that you need to do is look at the ground and make sure everything's clear around you, that there's nothing you're gonna trip over. Then you want to check your bill of materials to make sure you have everything to build it. There should be a packing list with your order that'll show that.
Mark Beam Levels on Your Uprights
Let's start off with taking your tape measure and sharpie and marking the different pallet rack beam levels where you want to install. In this example, our first beam is going to be at 8 inches, so measure out 8 inches from the bottom of the upright and mark that. Our next level is going to be at 48 inches so measure 48 inches from the bottom, mark that, and move on. Our final beam is going to be at 7 foot or 84 inches. So mark that off as well. You'll want to repeat that process for the front and back columns of your uprights of the starter sections.
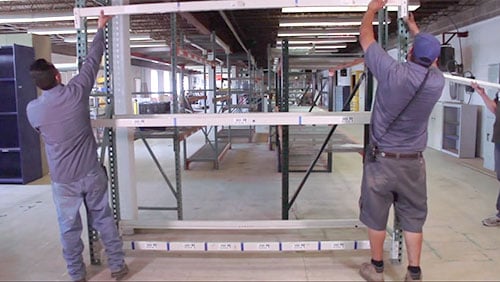
Install Beams into Uprights
Now that you've pre-marked all of your elevations for your starter bay of teardrop pallet rack, it's time to go ahead and insert your beams into your pallet rack uprights. As you install the beams, make sure that your safety device engages. If your safety device is broken or not working properly, you can use a J lock. We sell these and stock ten to twenty thousand at a time. Different manufacturers have different spots where you can insert the lock, giving you a tight connection that's safe.
Mark Your Straight Line
Now that we have all of the beam elevations in our starter section, at this point we want to push the rack back, take our straight line and run it the full length we're gonna run the installation. Snap out your straight line and that will give you a good point to build off of. After you get your straight line down, pull the rack back up even with your line.
Build Add-on Sections
Now you will start building your add-on bays. You've got your elevations all set, so all you have to do is drop the beams in and keep building uprights at the end of the run.
Square, Shim, and Anchor
So now you'll want to pull out your level to check that the rack is square and plumb before we anchor it. If it wasn't, then use shims to get everything straight. A good rule of thumb as far as safety parameters: 1/8th of an inch and 4 feet is a good general rule that it can be out of vertical alignment. Anything beyond that, you need to go back and work on getting it squared up
Need Help?
And that's how you install to your teardrop rack. This installation method is also applicable to many other styles of racking. If you need help or have individual questions on installing rack, feel free to contact us anytime. We'd be happy to help you!


